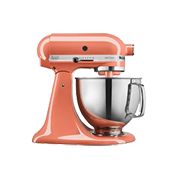
Descaling the KitchenAid Espresso Machine
Descaling the KitchenAid Espresso Machine
The descaling program enables simple and effective descaling of your Espresso Machine. Descale the Espresso Machine regularly, but a minimum whenever
the “Clean ( )” indicator is blinking. The frequency of descaling depends on the hardness of the water in your region. Therefore, it is important to program the Espresso Machine according to your location's water hardness level.
NOTE: The descaling process runs in 4 phases, takes approximately 10 minutes, and must be completed before the next use. At any time during the descaling program, you can pause the cycle by pressing the button. And resume too by pressing the
button.
IMPORTANT: Only use descaling solution intended for Espresso Machines.
Set up of Group Head Descaling
- Fill 8.5 ounces (~250 mL) water and 4.25 ounces (~125 mL) descaling solution inside the Water Tank.
NOTE: The clean cycle is designed to run as per the above-mentioned water and descaling solution volumes. The cycle cannot be completed with any less volume than mentioned above.
- Phase 1: Place a container [~ 17 ounces (500 mL)] on the Drip Tray below the Group Head. Press the Clean cycle (
) button for 3 seconds or until the Clean light is solid. Then, press the
button to start the first phase of the decalcification cycle.
Start/Cancel () will blink fast after the first phase is complete. Empty the container.
- Phase 2: Place the container [~ 17 ounces (500 mL)] below the Steam Wand. Then, press the
button. Start/Cancel (
) and Water Mode lights will blink fast after the second phase is complete. Empty the container.
- Phase 3: Place the container [~ 17 ounces (500 mL)] below the Steam Wand. Empty, rinse, and refill the Water Tank with fresh water to Max fill line. Replace the Water Tank. Press the
button.
Start/Cancel () will blink fast after the third phase is complete. Empty the container.
- Phase 4: Place the container [~ 17 ounces (500 mL)] on the Drip Tray below Group Head. Then, press the
button. Clean
light and the
button light will blink fast after the fourth and final phase is complete. Empty the container.
Press thebutton to complete the Clean cycle. The machine will go back into heating mode.
Still need help? Contact us or schedule service.
Please contact us or click below to make an appointment from our preferred list of service providers for service on your appliances.
United States
Canada
Interested in purchasing an Extended Service Plan?
Please click below to learn more on how you can save up to 25% on New Appliance Extended Service Plans within 30 days of your appliance purchase.
United States
Canada


.png)


