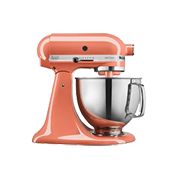
Assemble and Adjust a Bowl-Lift Mixer
How to Assemble and Adjust a KitchenAid Bowl Lift Mixer
Attach the Bowl
- Be sure speed control is OFF and stand mixer is unplugged
- Place bowl lift handle in the down position.
- Fit bowl supports over locating pins.
- Press down on the back of the bowl until bowl pin snaps into spring latch. You should hear it "snap" into place.
Raise bowl before mixing.
NOTE: It is important to push down on the back of the bowl until you hear an audible "snap."
If you do not hear the snap, the bowl may appear level, but it will not be locked into place, and the beater will hit the sides of the bowl.
Raise the Bowl
- Rotate handle to the straight-up position.
- Bowl must always be in a raised, locked position when mixing.
Lower the Bowl
- Rotate handle back and down.
Remove the Bowl
- Be sure speed control is OFF and stand mixer is unplugged.
- Place bowl lift handle in the down position
- Remove flat beater, wire whip, or spiral dough hook.
- Grasp bowl handle and lift straight up and off locating pins.
Attach flat beater, wire whip or dough hook
- Slide speed control to OFF and unplug.
- Slip flat beater on beater shaft.
- Turn beater to the right, hooking beater over the pin on shaft.
Remove flat beater, wire whip, or dough hook.
- Slide speed control to OFF and unplug.
- Press the beater upward and turn to the left.
- Pull beater from beater shaft.
Adjust the Beater to Bowl Clearance
Your stand mixer is adjusted at the factory, so the flat beater just clears the bottom of the bowl. If, for any reason, the flat beater hits the bottom of
the bowl or is too far away from the bowl; you can correct the clearance easily.
On bowl lift mixers, the adjustment screw can be in one of two places. If you do not see it in as in "A" above, it will be a tiny screw, as shown in "B." Before 1980, there were no adjustment screws, and an Authorized Service Facility must make adjustments.
- Unplug stand mixer.
- Place bowl lift handle in the down position.
- Attach flat beater.
- Adjust so flat beater just clears bottom surface of the bowl when in lifted position by turning screw (A) counterclockwise to raise the bowl and clockwise to lower the bowl. Just a slight turn is all that is required: the screw will not rotate more than 1⁄4 turn (90 degrees) in either direction. (The full range of adjustment is 1⁄2 turn or 180 degrees.)
NOTE: The adjustment screw for tilt head mixers is the same, but for bowl lift models, for some models manufactured after April of 2003, the adjustment screw must be rotated in the opposite direction. If a consumer tries to turn clockwise, and that does not help, have them try the opposite direction.
- Place bowl lift handle in up position to check clearance. 6. Repeat steps 4 and 5 if necessary.
When properly adjusted, the flat beater will not strike on the bottom or side of the bowl. If the flat beater or the wire whip is so close that it strikes the bottom of the bowl, the white coating may wear off the beater or wires on whip may wear. Or separate.
Signs that your mixer needs to be adjusted:
- The beater hitting the side of a bowl lift mixer means that the bowl has not been adequately snapped into place, even though it may appear level.
- Ingredients on the bottom of the bowl not being incorporated means the beater is too high.
- Tilt head not locking into place means the beater is too high.
- The white flat beater is chipping on the bottom or beater hitting bottom means the beater is too low.
Note: The "Dime Test" works for stainless bowls only, not glass or ceramic.
- Due to the nature of glass manufacturing, the clearance will be slightly different, and adjustments should be made without the dime until satisfied with mixing performance.
- It may take slightly longer for yeast dough ingredients to come together in a glass bowl.
Refer to the below video for Bowl Adjustment
If these suggestions did not help, please Contact Us or visit our Service Locator.